

Failing drive belts is perhaps the most problem you encounter most frequently when servicing Commodore’s 1530 and 1531 datasettes today. But when should you replace the drive belt and how do you do it?
Commodore’s many datasettes
As illustrated in Giacomo Vernoni’s eBook on the topic, Commodore produced an impressive range of datasettes. Many of them were compatible with the same computers, albeit in some cases through the use of an adapter.
In this post, I will focus on the later range of datasettes produced for the VIC 20, the C64 and the C16. Although the naming varied, I will refer to the as 1530/1531 going forward.
As was the case with most of Commodore’s products, the 1530/1531s were made from standard components sourced from a variety of manufacturers. Unlike the electronical parts, which came in many variants, the tape drives are quite similar when it comes to the mechanical parts.
Since the mechanical parts roughly were the same, you only need two different types of drive belts when servicing them. The main drive belts are 75mm / 1.2mm square belts. The tape counter belts are 59mm / 1.2mm square belts.
Belts gone bad
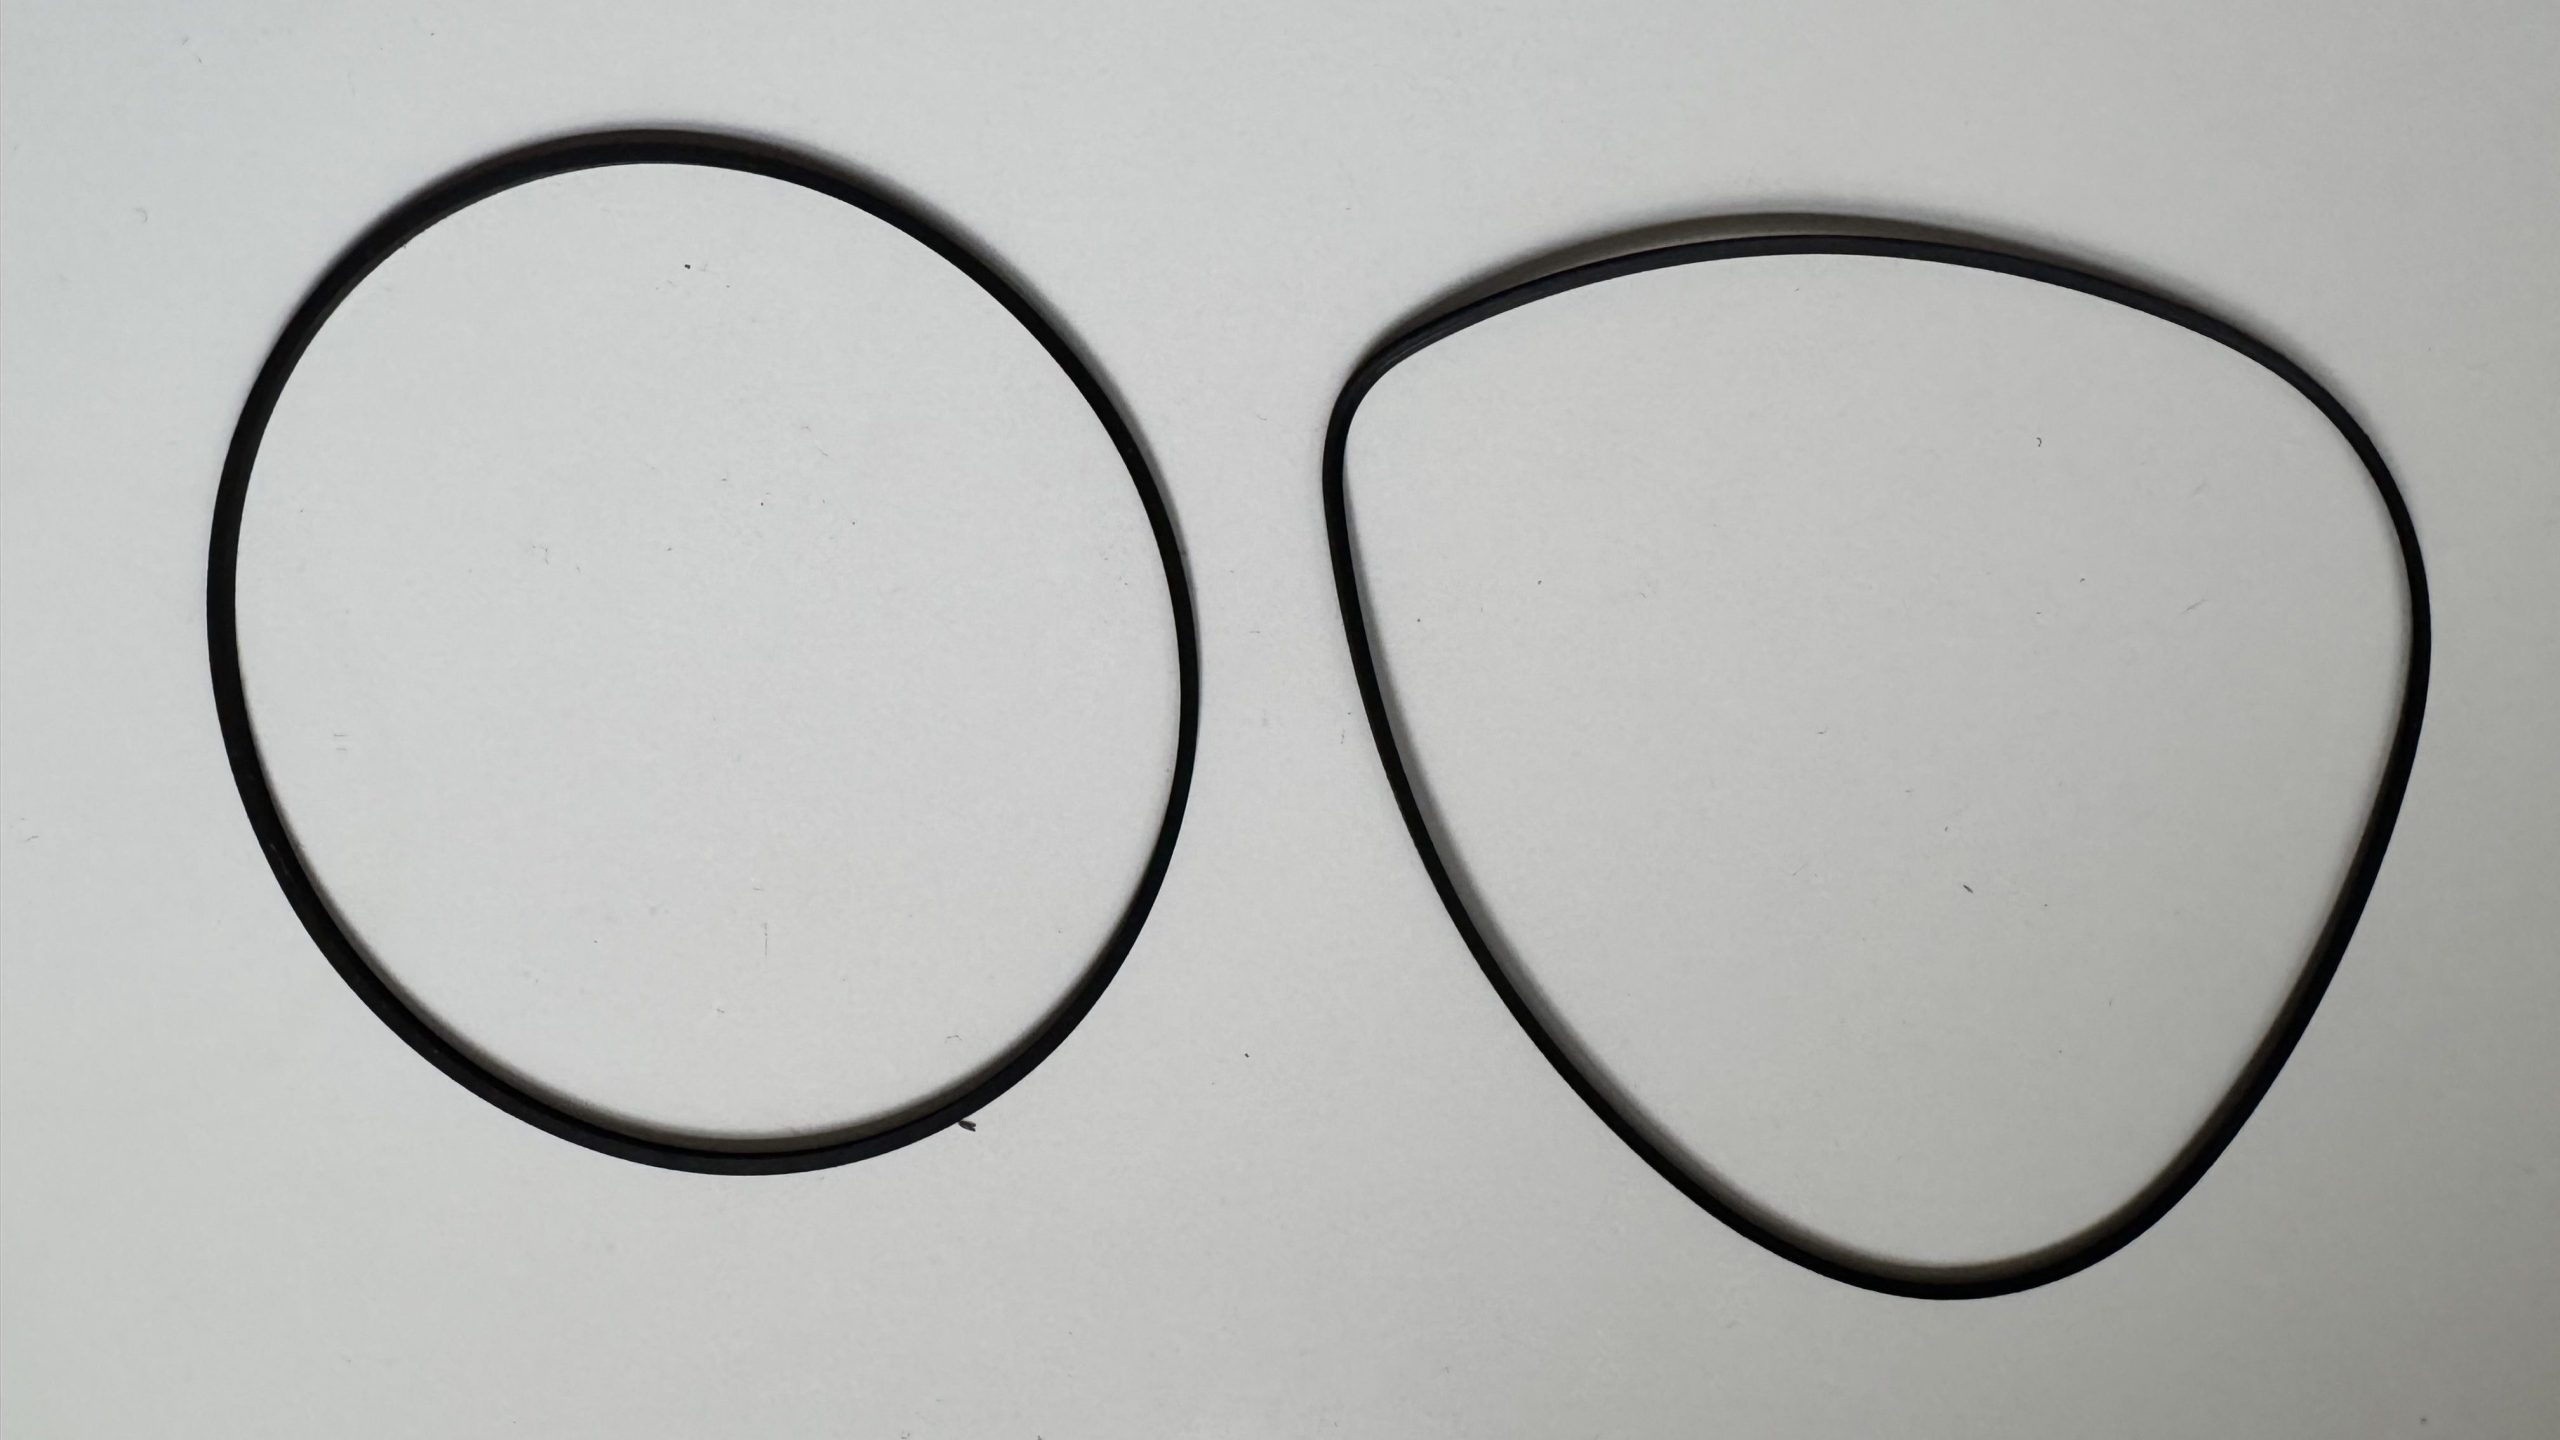
What does a bad drive belt look like? In the photo below, you see a new drive belt and a drive belt that had stopped working on the right. One thing you will notice is that the bad drive belt has developed a dent. When installed in the datasette, it connects the engine with two different spindle wheels. The dent is where it touched the engine wheel.
Some belts still work even if they have dents, but they may run as varying speeds. So a dent might be an issue but the mere fact that the belt has a dent doesn’t mean that it needs replacing. If it works, using it may help it grow back into shape.
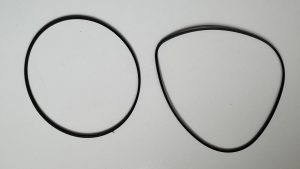
In other cases, failed belts are pefectly round, but their diameter has increased to a point where they don’t have the necessary grip to drive the spindles.
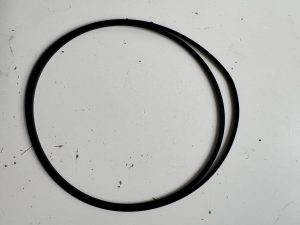
Below, you see a perfectly good belt on top of a bad belt. The bad belt has a visibly larger diameter, but it is still almost perfectly round.
Replace or not replace?
This may be a matter of opinion, but as a principle, I don’t repair anything until that isn’t broken. There is always a risk that losening a screw causes the 40-year old plastic to crack etc. The exception, or course, is repais that are necessary for preventive reasons such as removing a leaky battery.
Convince me otherwise but replacing a drive belt serves no preventive purposes. As long as it works, it works. When it stops working, I replace it.
I rarely replace tape counter belts, as I usually find them to be working. The amount of load on the tape counter belt is limited, as it only drives the counter. The load on the main belt is considertably larger, as it not only drives the tape but also the tape counter.
In my experience, main belts fail way more often. In a recent lot of 17 datasettes, I replaced 5 main drive belts and no tape counter belts.
If I experience any of the following symptoms, I replace the main drive belt as it usually solves the problem:
- The spindles run at normal speed without a tape inserted, but when the tape is inserted, the speed drops or the tape stops running.
- The tape drive has difficulties driving long tapes, but works with shorter tapes.
- After “Found” was shown, the tape motor should recommence loading, but it doesn’t. You may still be able to complete loading by pressing stop and play manually. The spindles appeared to run at normal speed.
How to replace a drive belt
Replacing a main drive belt requires that you remove the small screw on the side of the wheel mount (red arrow on the left) and loosen the screw holding the cover plate (red arrow on the right). You don’t need to remove the PCB. I usually put the belt in place around the black spindle wheel. Then, I pull it through the opening in the cover plate and position it around the large capton drive wheel before I finally connect it to the motor.
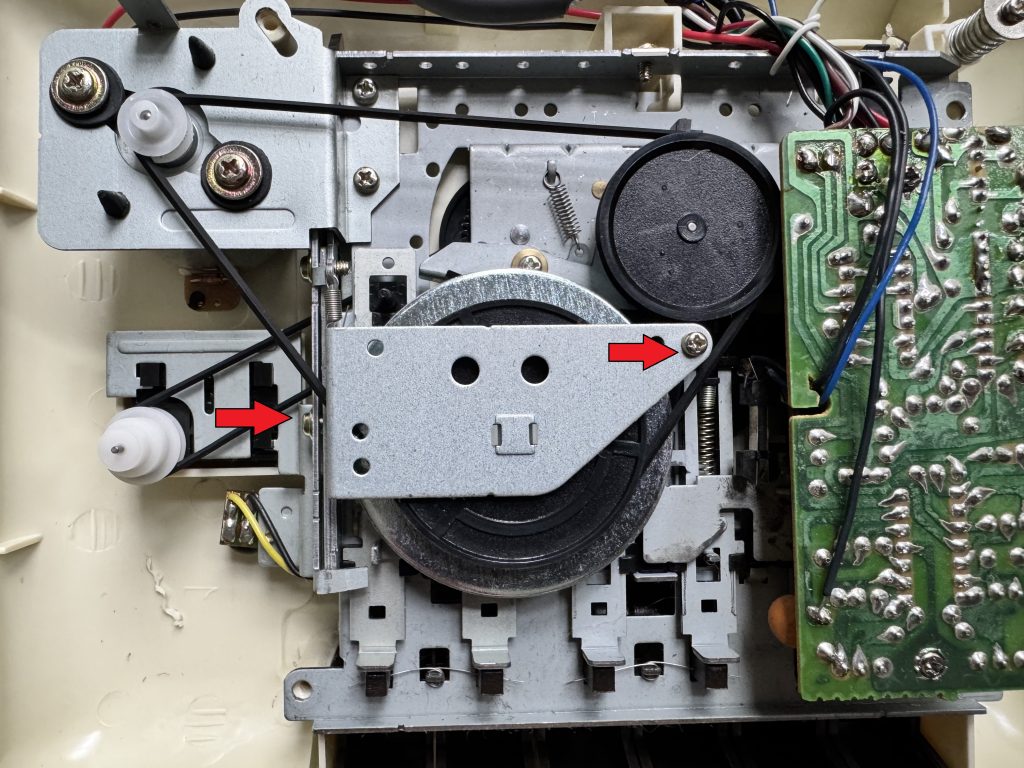
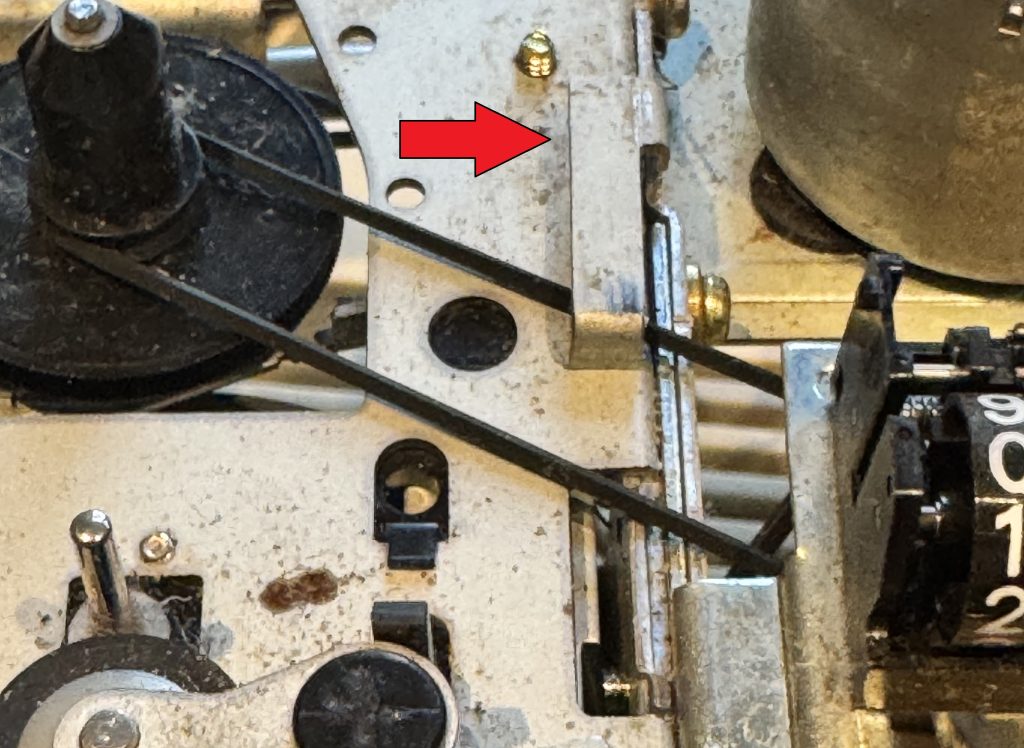
When replacing the tape counter belt, you don’t need to remove any screws. Simply raise the arm (red arrow) that releases the tape door, and put the belt in place around the spindles on either end.
Leave a Reply